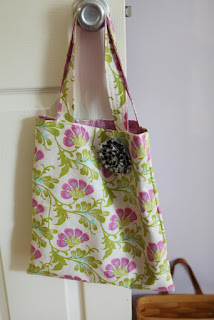
Beginners: this is a PERFECT project for you - all nice, easy straight lines.
Intermediate and advanced: Whip this up in no time or add embellishments like contrasting fabric, ruffles, embroidery, etc.
Let's go!
Materials:
- Approximately 1/2 yard each of two different fabrics
- Scissors
- Rotary cutter, mat, ruler (these are not necessary, but encouraged to save time!)
- Thread and pins
Step One: Cut
(I save time by cutting the fabrics all at once. Then you know they are the same size too!)
Fold your two fabrics and place one on top of the other. Using the fold, cut a 13" wide by 15" high rectangle. IMPORTANT: If your fabric has direction (like birds, for example), then you can't use the fold or else the back side of the fabric will be upside down (like dead birds, for example!). Don't ask me how I know this. Just don't! So in that case, you would cut one rectangle 13" wide by 15.5 " high NOT on the fold!
Next, with the fabric still piled on top of each other, cut a long strip 2" wide by 21" long (don't cut on the fold). You should have FOUR long strips (two in one fabric, two in the other).
Step Two: Sew
I sew everything I can at once, then iron everything at once, etc. That way you aren't up-down-up-down-iron turned off-where's my water?-that toy doesn't belong there-what was I doing?-Oh yeah, sewing...
So, take one of the folded fabric rectangles and sew down the two long sides with about a 1/4" seam. Take the other folded fabric rectangle and do the same.
IMPORTANT: If you have directional fabric, make sure you flip the rectangle, so that both sides are going up. No dead birds!
Then take long handle strips and mix them so that you are sewing two different fabrics right sides together. Sew up one long edge, pivot, sew across one short edge, pivot, and sew down the other long edge. Repeat for other handle. Turn inside out. Use one of these inside outer tools. (Mine has seen better days!)Best. Invention. Ever. (Besides the dishwasher and the epidural. And the Magic Eraser. But that's a post for another day!)
Step Three: Iron
Take all pieces with you to the iron. Iron down the straps so they are nice and flat.
You don't have to worry too much about getting the ends perfect. They will be hidden.
Fold 1/2 inch of the top of the two bag pieces to the wrong side. Press with iron.
Step Four: Sew
Almost done!
Sit back down at the sewing machine. You are going to topstitch the handles. You are going to sew four long rows of stitches - close to each long edge and two rows evenly spaced down the middle. I don't start and stop my sewing. I just sew all four lines by pivoting when I get to the end of the strap. The ends will be tucked inside, so it doesn't matter what they look like. Repeat for second handle.
Pick which fabric you want to be the main outside fabric - the one you want showing most of the time. Keep that one right side out. Turn the other fabric inside out. You will be sewing these wrong sides together. Put the inside fabric inside, match side seams, and pin together at the top.
Tip: Make sure the top fits exactly together. If one piece is bigger, you will get wrinkles and overlaps when you sew it together. Now is the time to fix it. If one piece is bigger, unpin and sew another side seam to make it smaller.
Figure out where you want your straps to go. I usually put mine around 2 inches from each seam. Tuck the ends of the straps between the two layers of fabric you just pinned together. Pin the straps in place. Make sure they aren't twisted.
Sew around the whole top of the bag about 1/4" from the edge.
Tip: Take a look at the inside. Make sure you caught the contrasting fabric in all the seams. If you didn't, sew another seam and pretend it was intentional topstitching.
You are finished!!
Flower embellishment tutorial to come separately!


Thanks for the tutorial. Very easy to follow.
ReplyDeletevery cool tips-i always try to remember to cut my fabric pieces and iron all at once too ...
ReplyDeletelove the tube turner-it's one of my favorite tools...
do you have a tutorial for the flower embellishment?
This is the bag you taught my girls to make almost 2 years ago. It is an easy bag! The girls are still using theirs, and Sarah made another one to give to her Grandma.
ReplyDeleteI can't wait to try this out. Don't ask me about how I know to be careful not to twist the straps. Knitting socks in the round can teach that same lesson.
ReplyDeleteI love this, can't wait to try to make one of my own!
ReplyDeleteGreat, simple tutorial! My niece wants me to teach her to sew this summer, and this would be a perfect first project. I need to get one of those turner-out tools. Your comments about other great inventions cracked me up. Don't know about the epidural, but those Magic Eraser sponges totally rock. A friend was going to rent out her house and move to a smaller one. She thought she needed to repaint the entire interior, but once I went over the walls with those sponges, she didn't need to paint. How cool is that?
ReplyDelete